Minting a single piece of digital art on XRPL Home takes a few minutes. This guide follows the whole flow end to end — from connecting your wallet to the moment Mint Complete appears on screen — with a screenshot of almost every screen you will pass through.
Nothing here is a workaround or a power-user trick. This is the standard Digital Art mint on XRPL Home, exactly as the product ships. Work through it once and the next piece will take you two minutes.
Connect your XRPL wallet — Xaman, for example — to XRPL Home before you start. You will use it again at the end to approve the mint.
Start the mint on XRPL Home
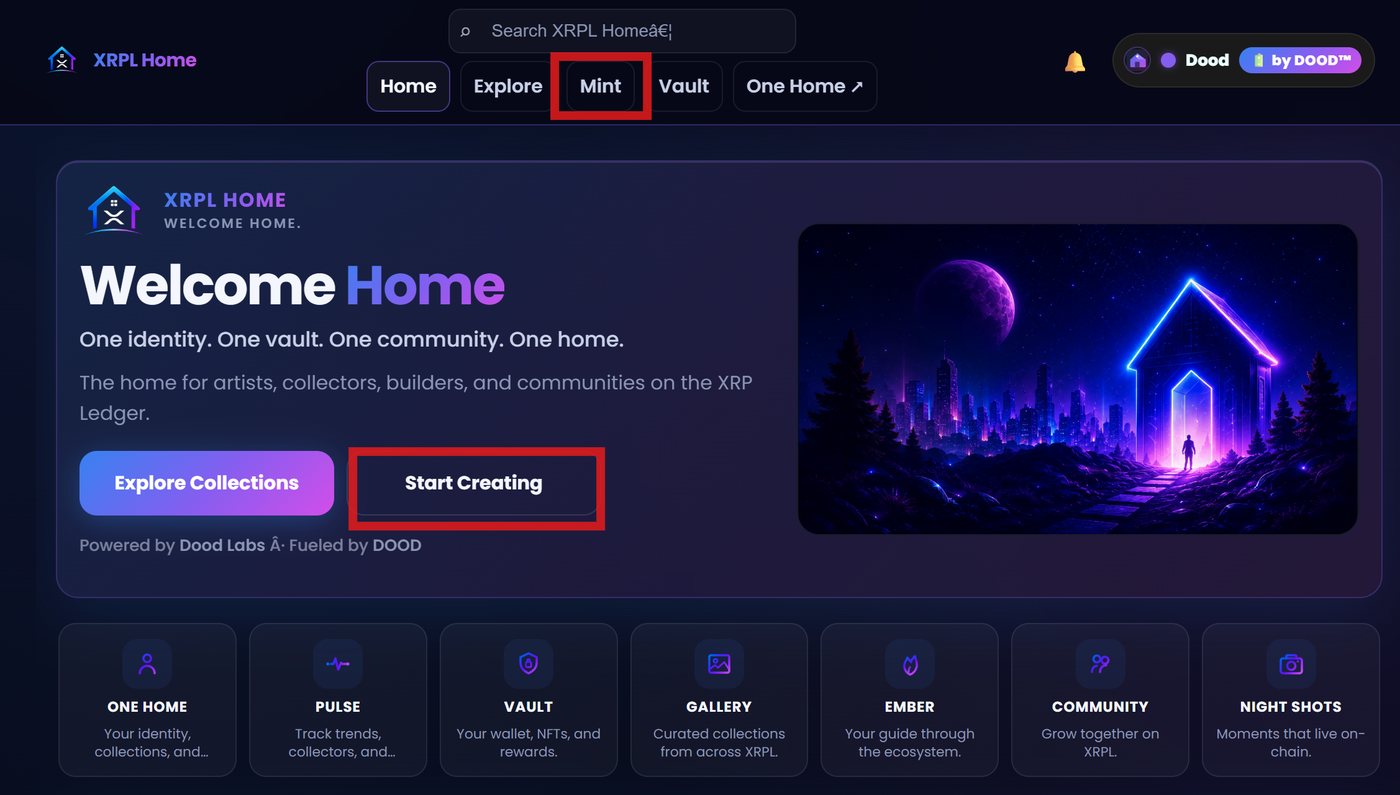
Once you are connected with your wallet, click Mint in the navigation bar, or Start Creating on the Home page. Both routes open the same flow.
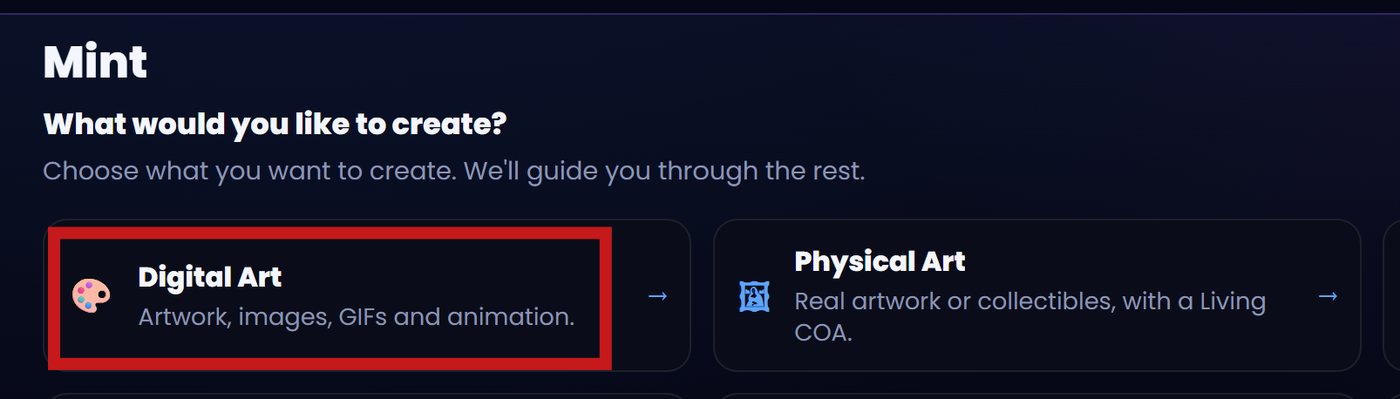
Then choose what you would like to create. Select Digital Art — artwork, images, GIFs and animation.
Choose its home: collection and taxon
Every piece lives somewhere. Choose the collection this artwork belongs to. If it is the start of something new, create the collection first, then come back to the mint.
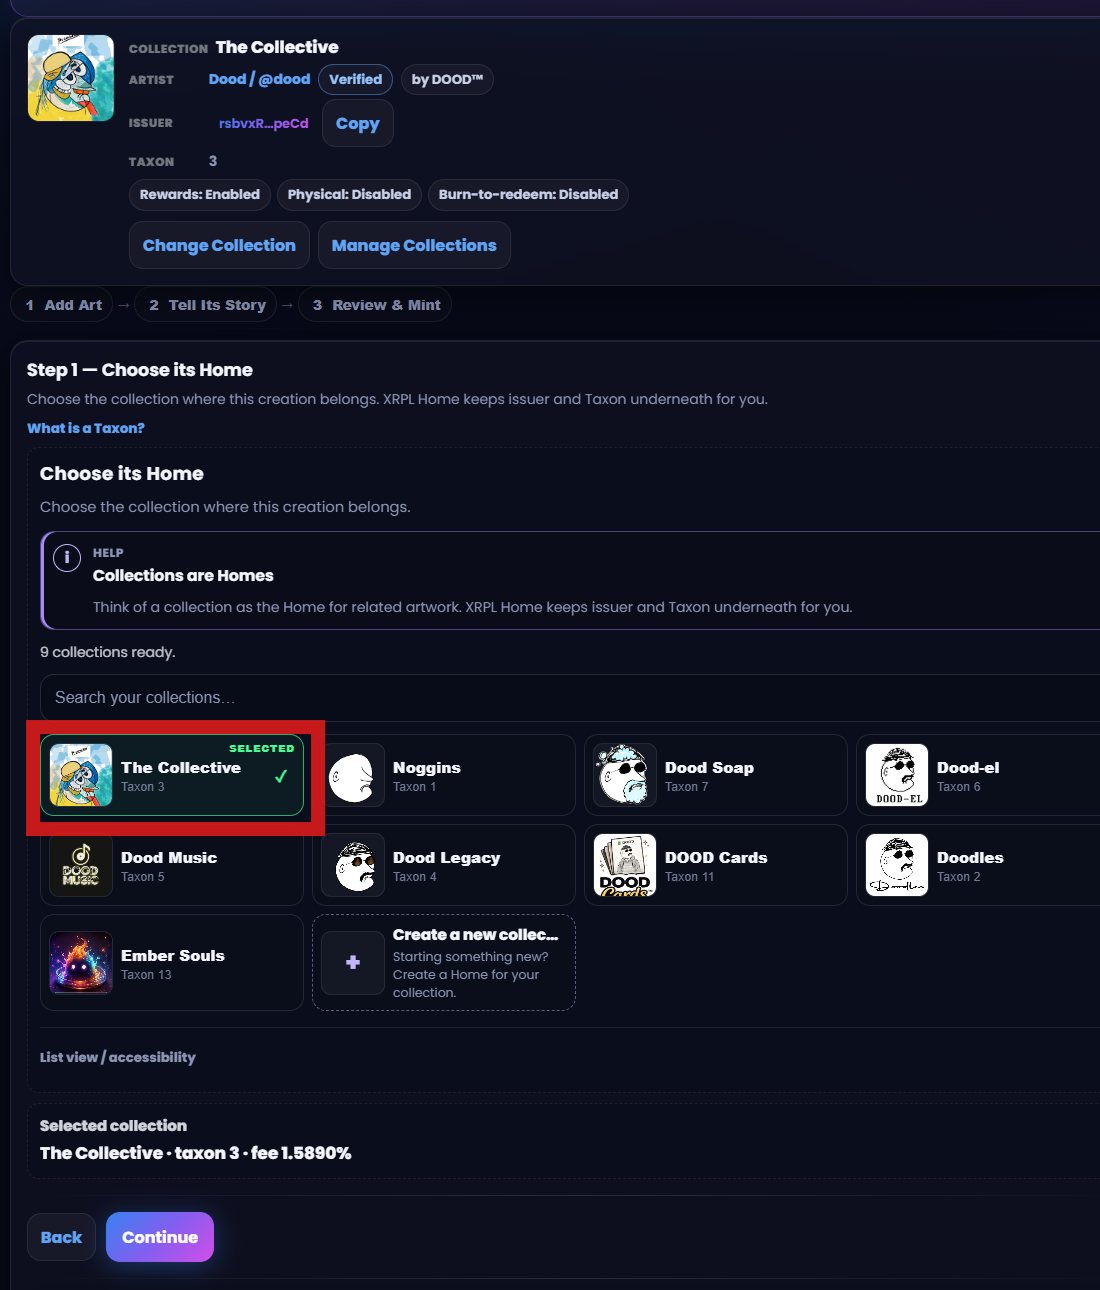
XRPL Home keeps the issuer and taxon underneath for you, so you are choosing a home for the work rather than hand-managing ledger plumbing.
- Confirm the collection and taxon are correct.
- Click Continue.
Upload your artwork and confirm your rights
Accepted formats are JPG, PNG, GIF and WebP — typically under 10MB for a smooth mint.
Until your artwork is uploaded and ownership is confirmed, you will see a Needs Attention banner at the top of the page. It is a checklist, not an error.

- Drop your art in
Add the file, and give the upload a moment to finish processing before you move on.
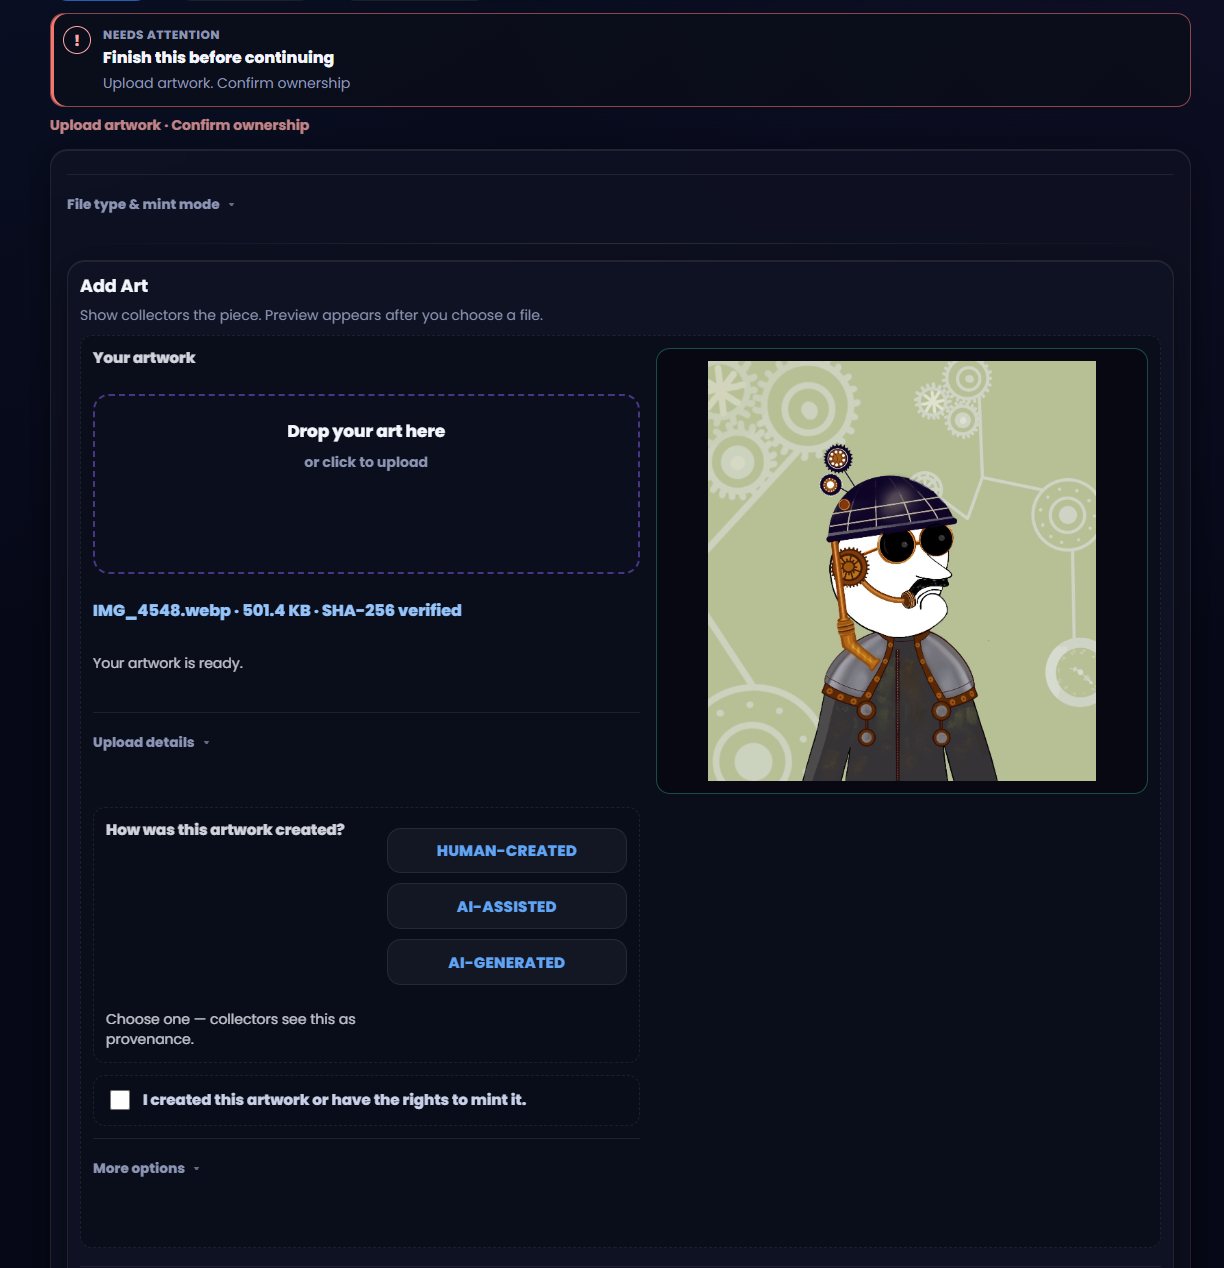
Artwork uploaded and ready — confirm ownership to continue. - Confirm you own it
Check the box for “I created and own this artwork (or have rights to mint and sell it).” Once checked, the alert clears and you can proceed.
- Set your Upload Details
Under Upload Details, choose how the artwork was created — Human-Created, AI-Assisted, or AI-Generated. Collectors see this as provenance, so answer it honestly; it is part of the record that travels with the piece.
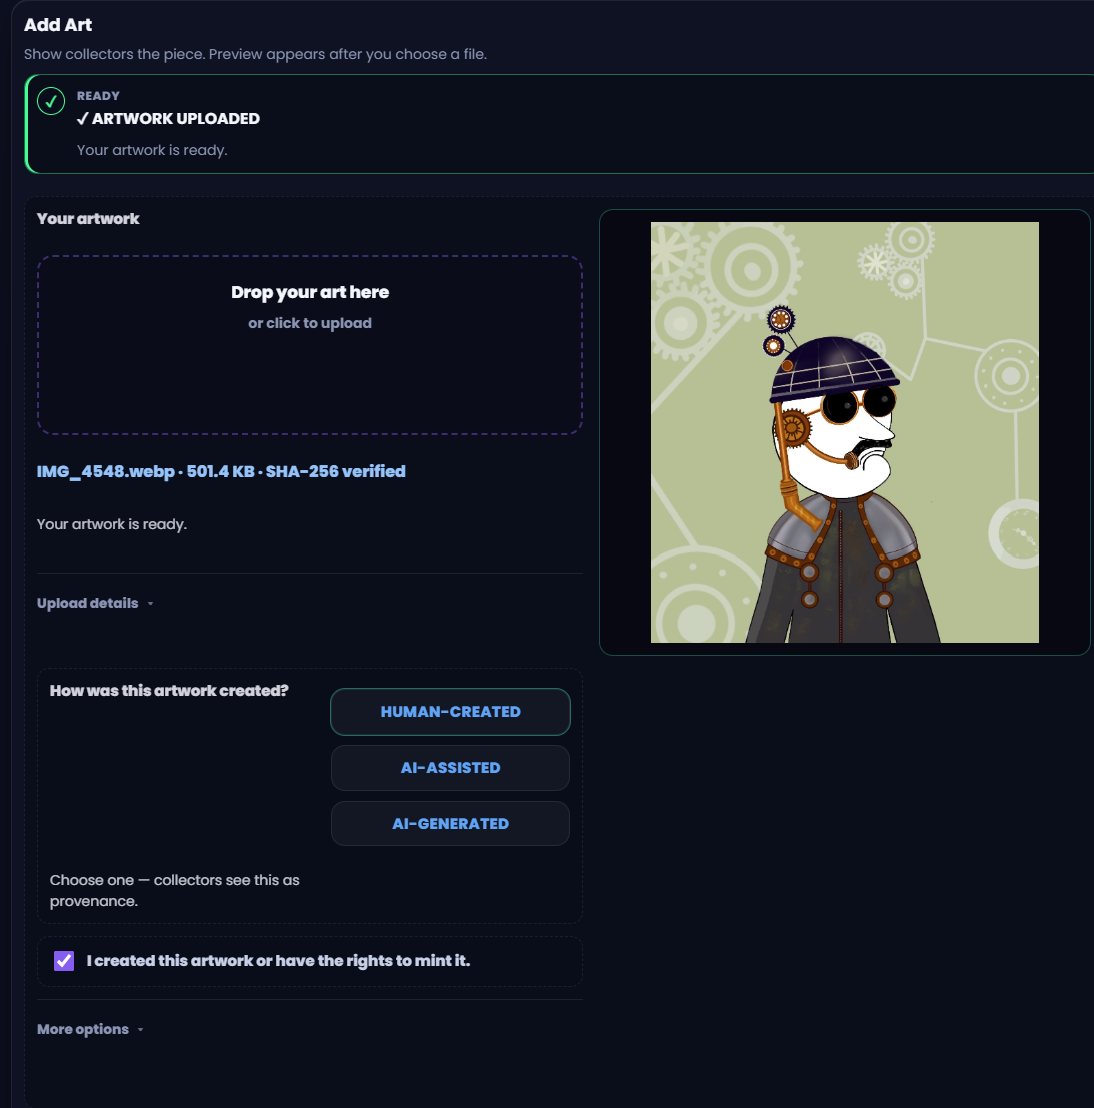
Choose the AI-disclosure option that matches how the piece was made. - Review the preview
Check the image preview before continuing. Your file is stored permanently through XRPL Home’s upload and IPFS pipeline, so what you see here is what collectors will see. Then click Continue.
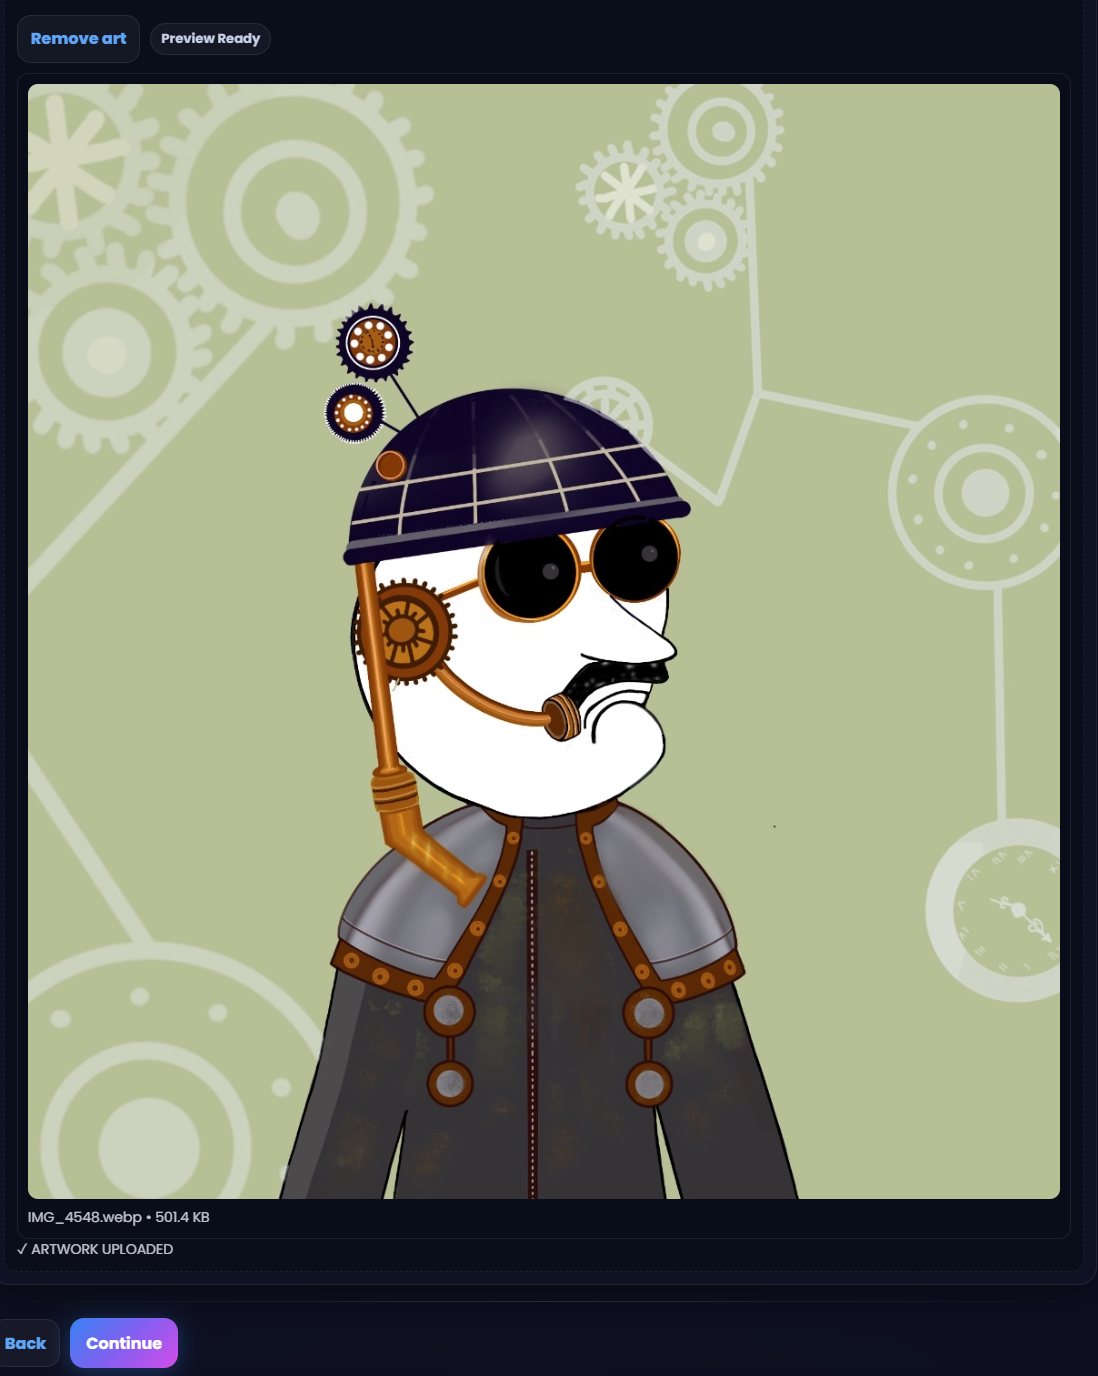
Preview your artwork, then click Continue.
Tell its story: name, artist and traits
This is the part most artists rush and later wish they had not. Add a Name, an Artist Name, and a Description for the piece. The description is where the work stops being a file and starts being a story a collector can retell.
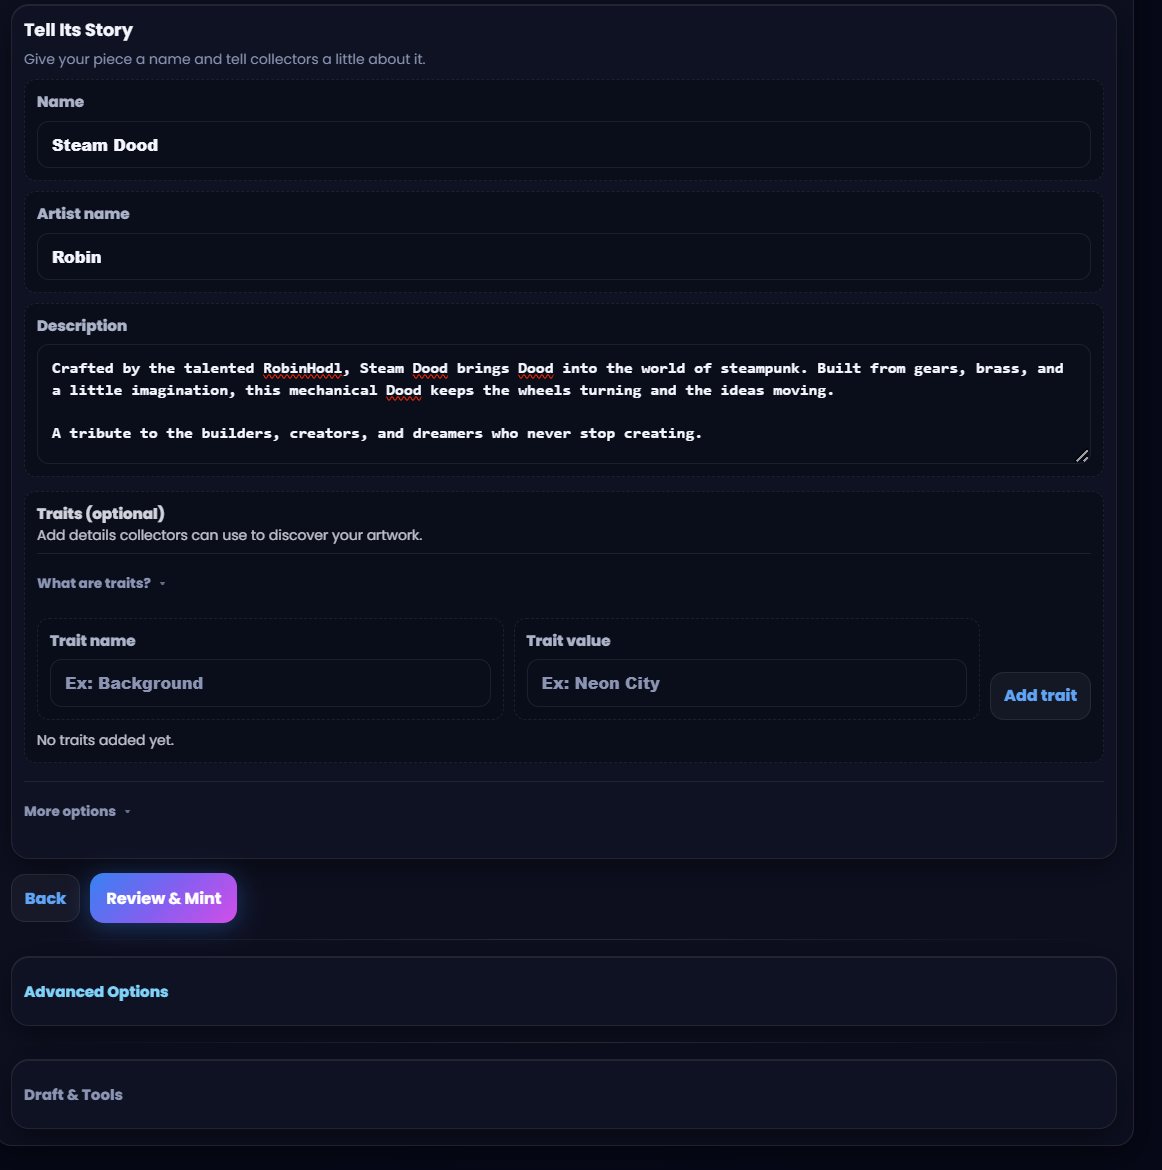
Traits are optional. To add one, enter a Trait Name and a Trait Value, then click Add Trait. Repeat for as many as you need.
When the story reads the way you want it to, click Review & Mint.
Review, set your XRPL NFT royalty, and mint
The review screen is your last look before the ledger. Confirm everything is right: artwork, story, and rights should all be checked off.
Set your creator Royalty, anywhere from 0–50%. That is the percentage you receive from eligible secondary sales on XRPL-compatible marketplaces — the royalty is written into the token itself, so it travels with the piece wherever it is traded across the XRP Ledger.
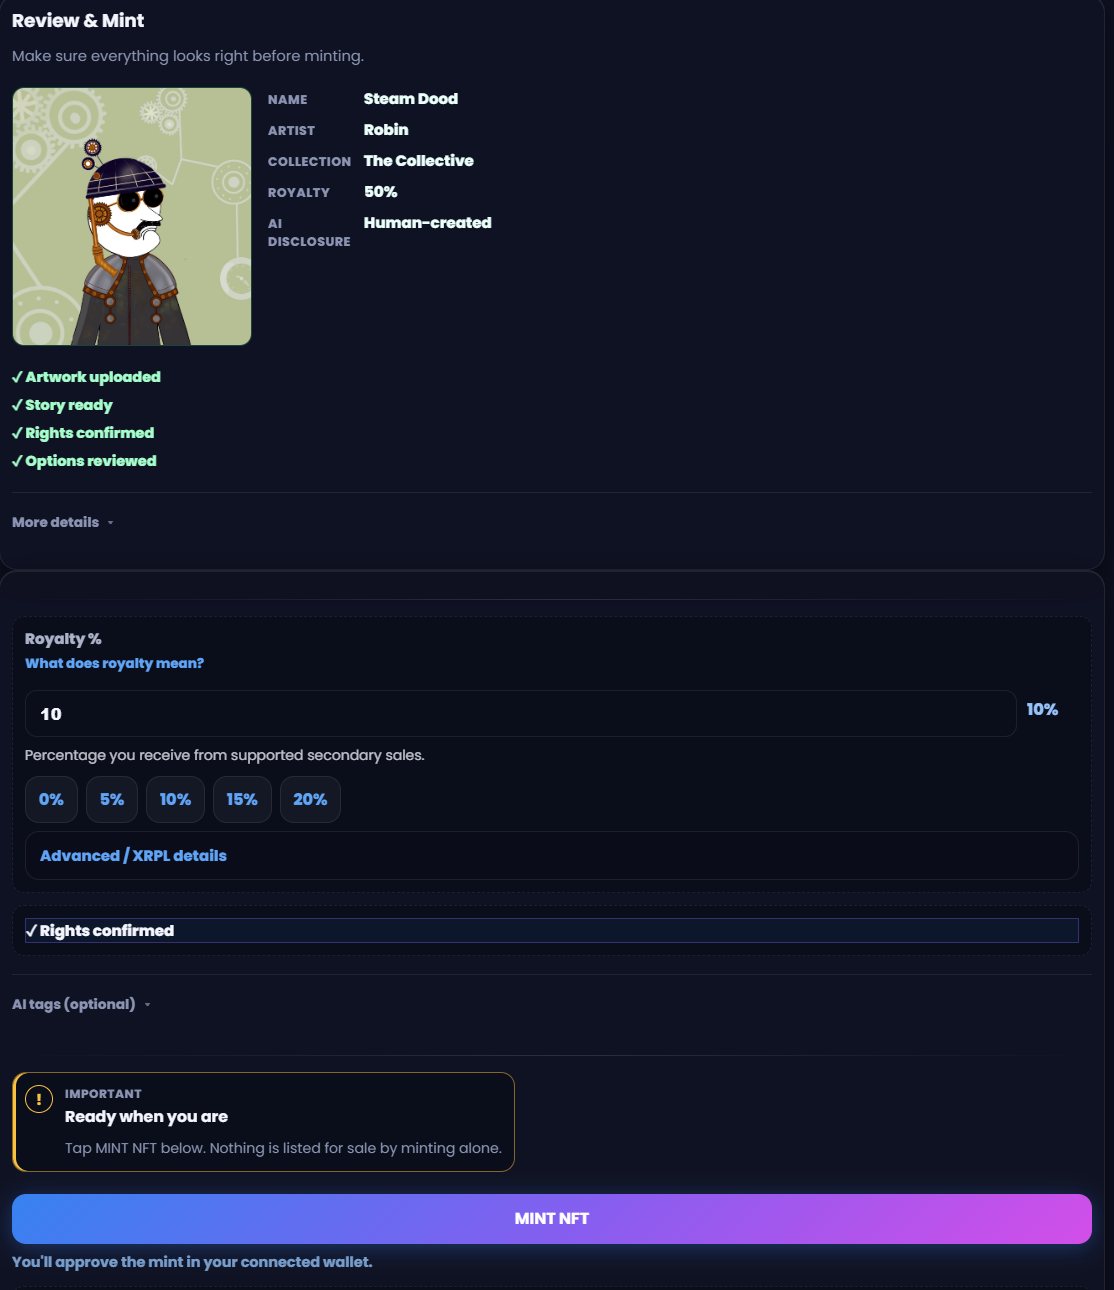
Click Mint NFT. This generates a signing request — open it directly in your browser, or scan the QR code to approve the transaction in your connected wallet.
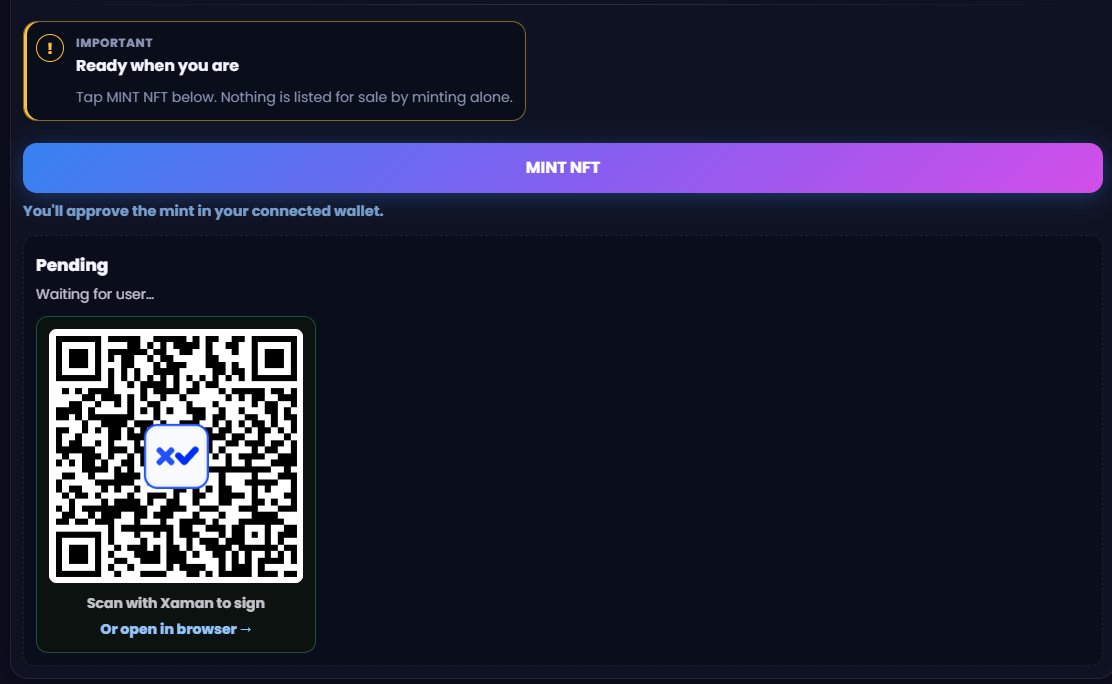
Once you approve, the transaction settles on the XRP Ledger in a few seconds and you will see a Mint Complete confirmation on screen.
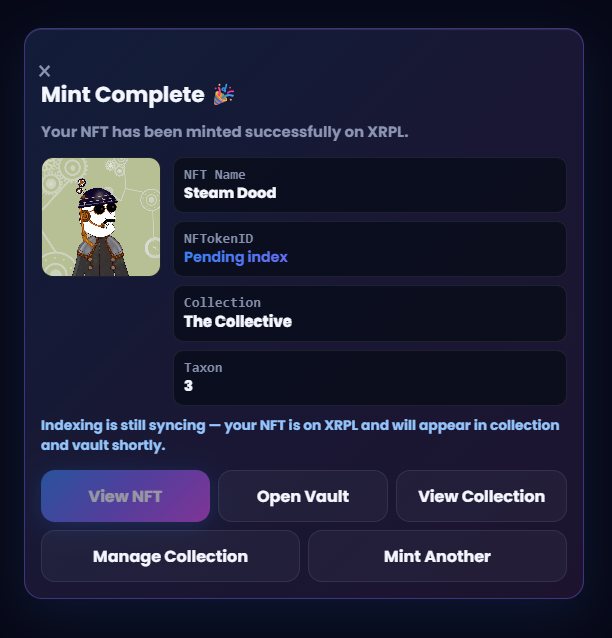
That is it. The piece is on the ledger, the royalty is attached, and the provenance you entered is now permanent.
Advanced Options and what happens next
Every step of the Mint flow has Advanced Options if you need finer control — look for the expandable sections on each page.
Your minted work lives in your Vault alongside your wallet and rewards, and it is indexed on Explore with everything else on the XRP Ledger. Mint anywhere, create anywhere, find it home.
If the piece you want to mint is a real-world object rather than a file, the flow is different: see the Physical Art + COA lifecycle, or the Reveal Mint™ and Living COA™ guide if you want the artwork to stay hidden until it arrives.
Key takeaways
- Connect an XRPL wallet such as Xaman before you start; you approve the mint with it at the end.
- XRPL Home manages the issuer and taxon for you when you pick or create a collection.
- Accepted formats are JPG, PNG, GIF and WebP, typically under 10MB, stored permanently via IPFS.
- Upload Details records whether the work is Human-Created, AI-Assisted or AI-Generated, and collectors see it as provenance.
- Creator royalty is set at mint, from 0 to 50%, and applies to eligible secondary sales on XRPL-compatible marketplaces.
Ready to mint?
Your art belongs on-chain. XRPL Home takes you from wallet connect to Mint Complete in a few minutes.
Start creating More from the HearthWritten for the XRPL creator and collector community and originally shared with the 🔋 by $DOOD™ CommUnity. XRPL Home is the home for XRPL art — mint anywhere, create anywhere, find it home.
Nothing here is financial advice. Always do your own research before buying, minting, or investing.